
Windows Server Domain Controller Setup Guide
Deploy Active Directory Domain Services, configure DNS, build organizational unit structures, and join Windows clients to your domain for enterprise lab environments.
This guide walks through deploying a Windows Server Domain Controller in your Proxmox lab environment. You'll learn how to set up Active Directory Domain Services (AD DS), build organizational units, and join client machines to your domain.
Phase 1: Windows Server Preparation & AD DS Role
Before installing Active Directory Domain Services (AD DS), your server must be properly prepared with a static IP and appropriate configuration.
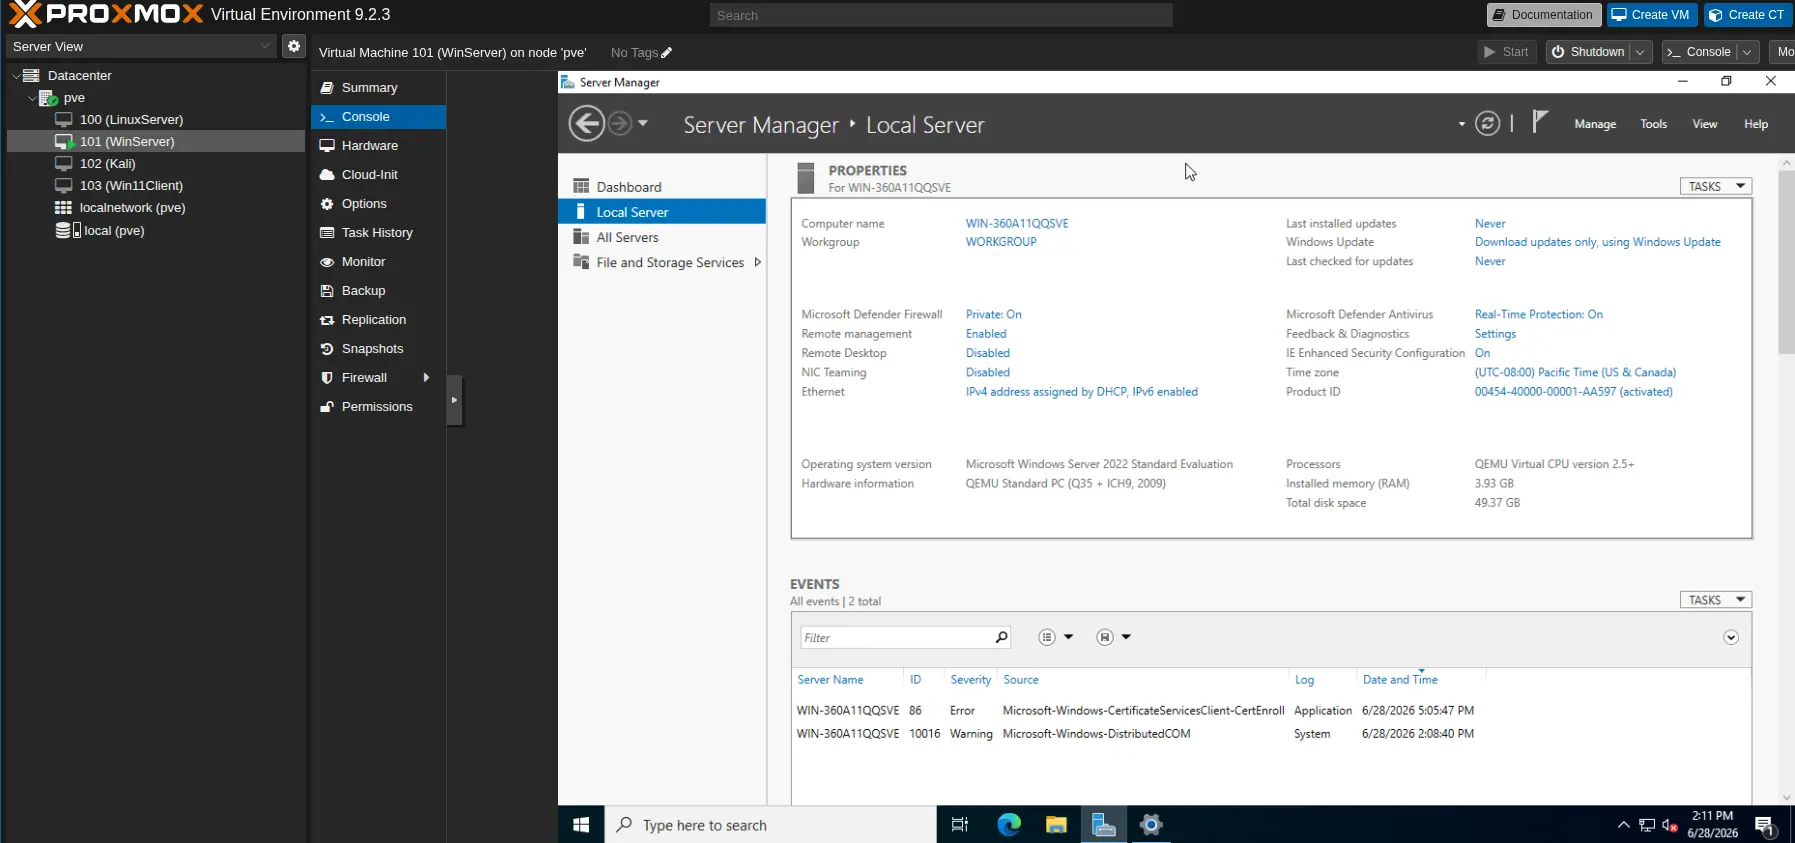
Step 1: Set a Static IP
Your Domain Controller (DC) must have a consistent IP address that does not change.
- Open Network Connections on your Windows Server VM.
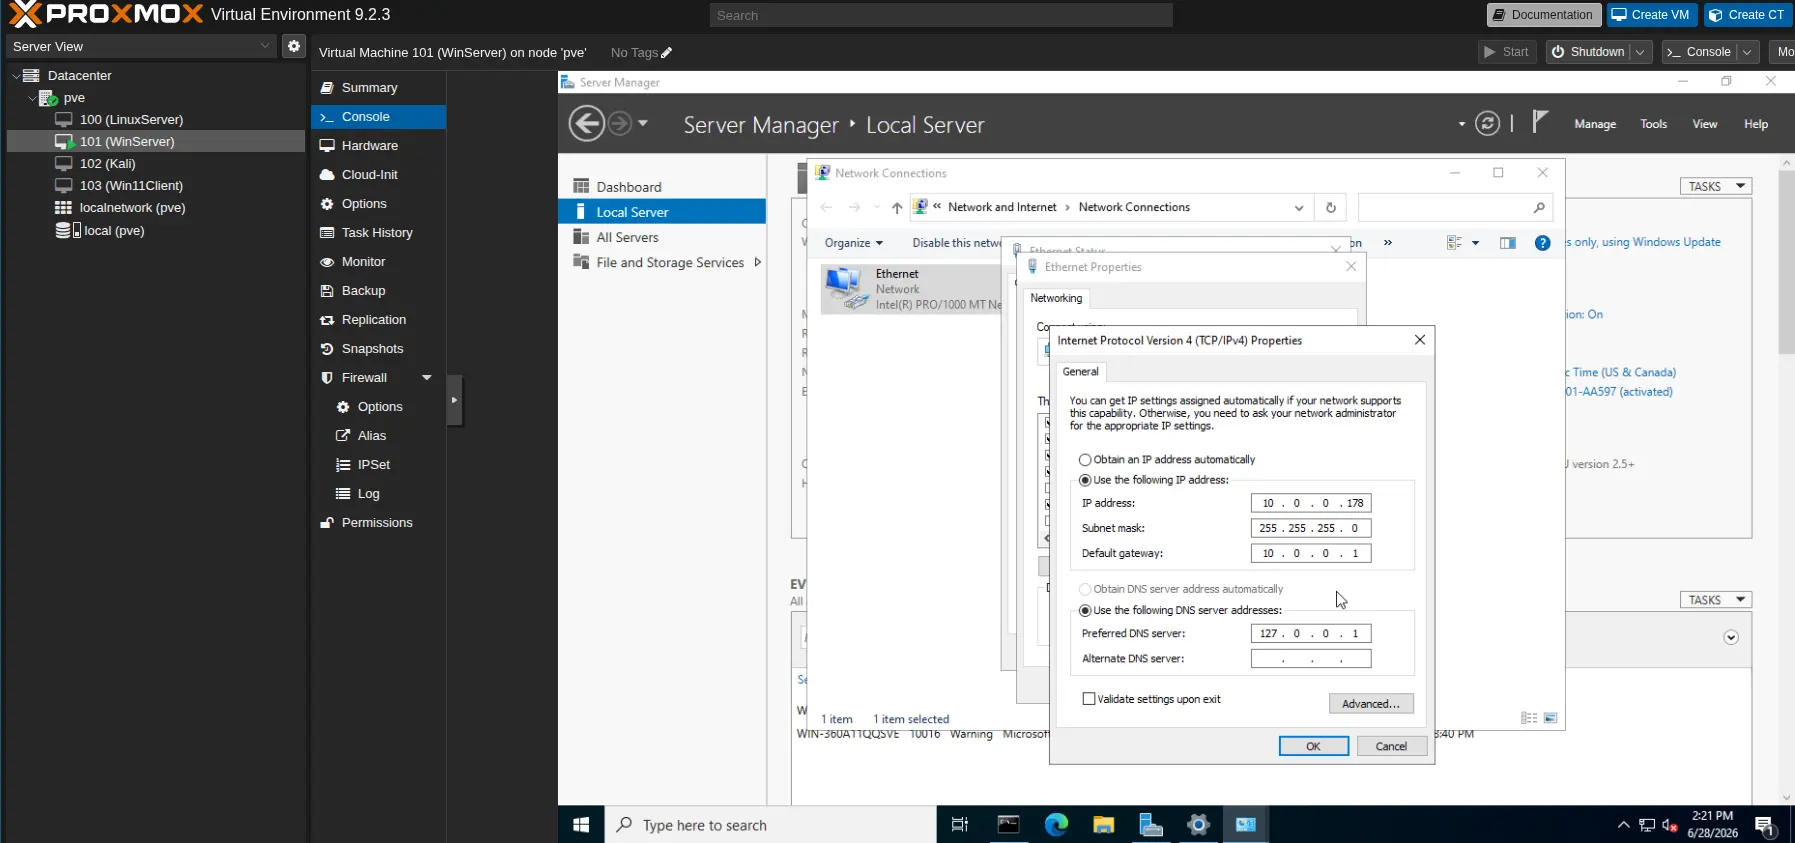
- Right-click your network adapter → Properties → IPv4.
- Assign a static IP (e.g.,
192.168.1.10). - CRUCIAL: Set the Preferred DNS server to
127.0.0.1(the machine itself). This ensures the DC queries itself for DNS resolution.
Step 2: Rename the Server
Give your server a clear, descriptive name such as DC01 via System Properties, then reboot.
Step 3: Install AD DS Role
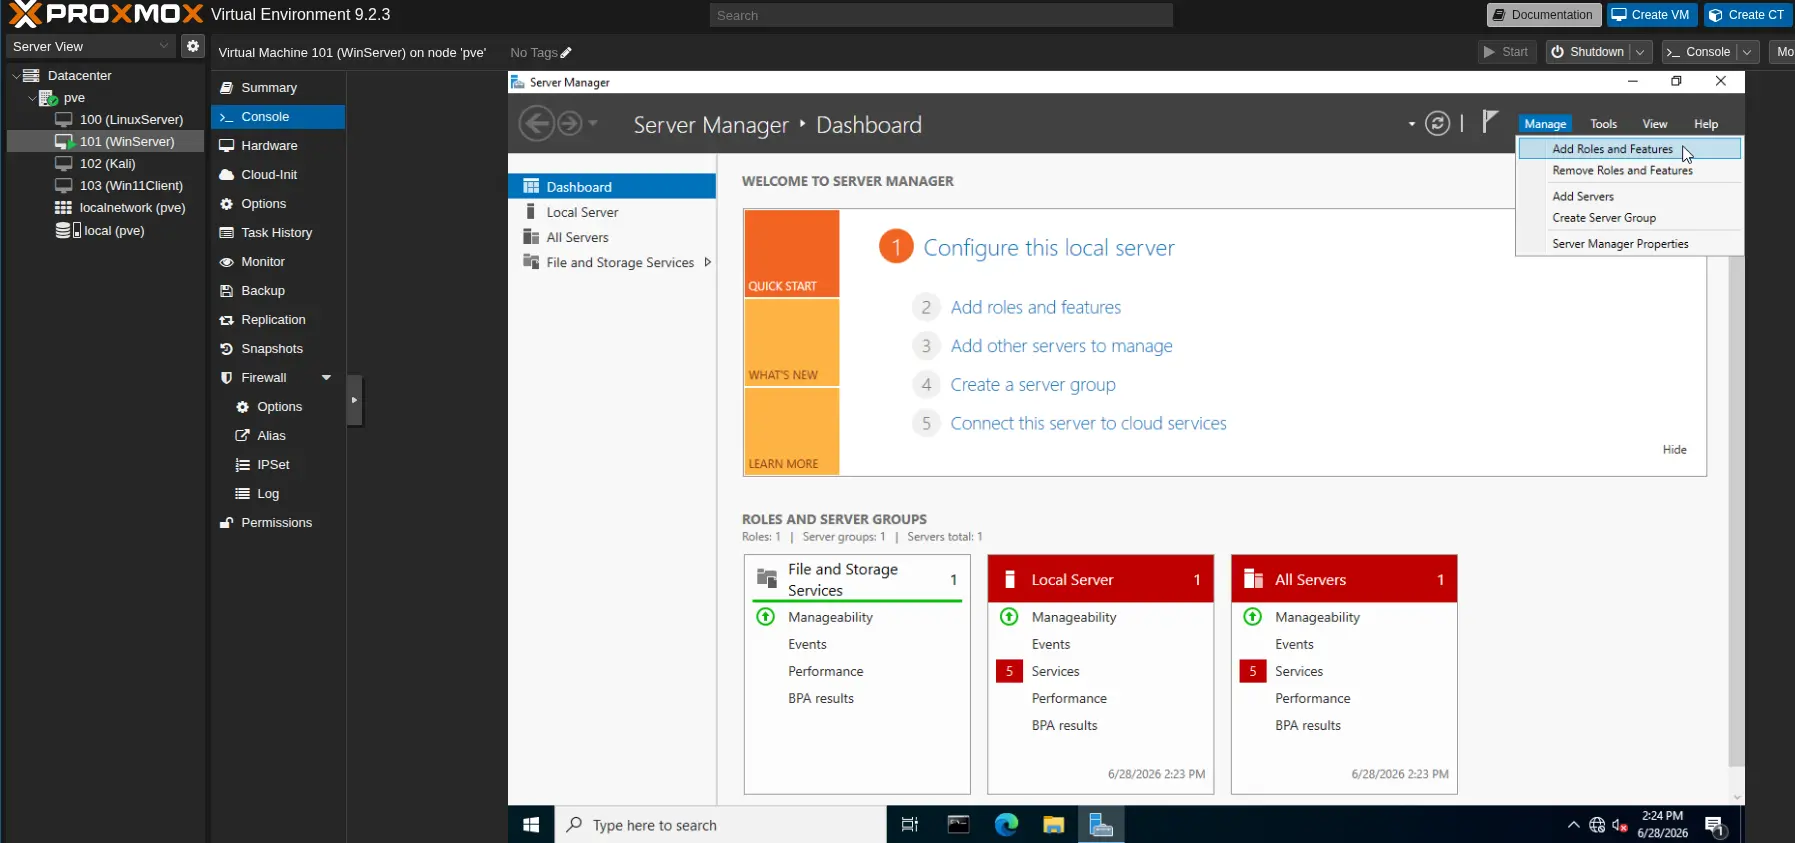
- Open Server Manager → Manage → Add Roles and Features.
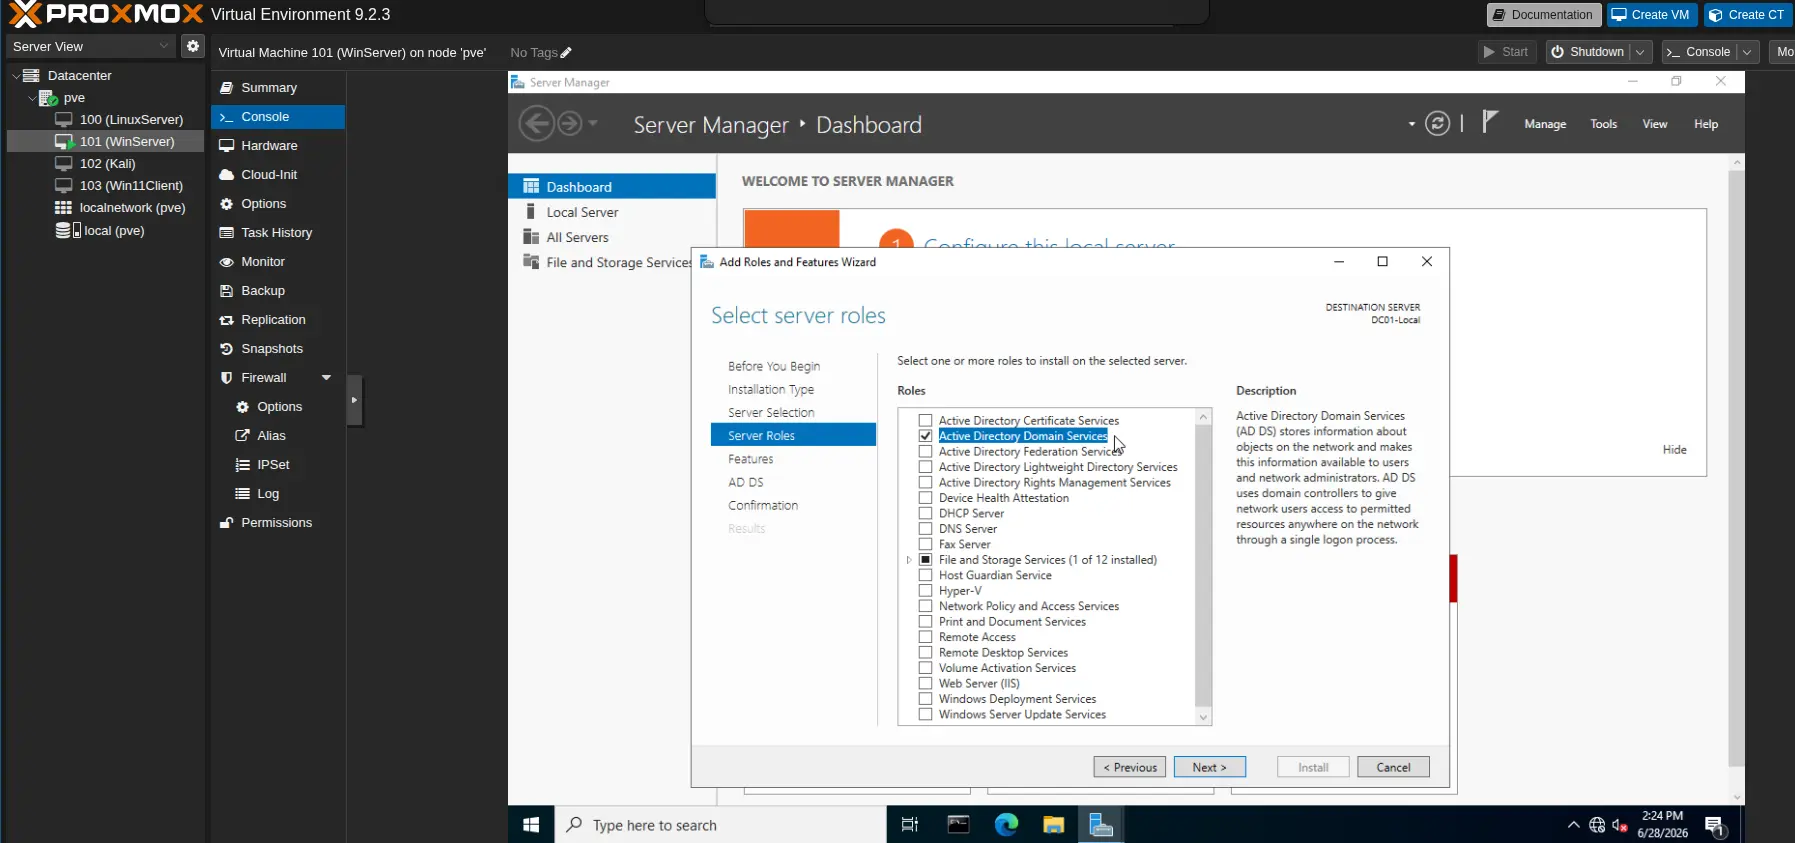
- Select Active Directory Domain Services and proceed with the installation.
- Complete the wizard and let the server install the necessary binaries.
Step 4: Promote to Domain Controller
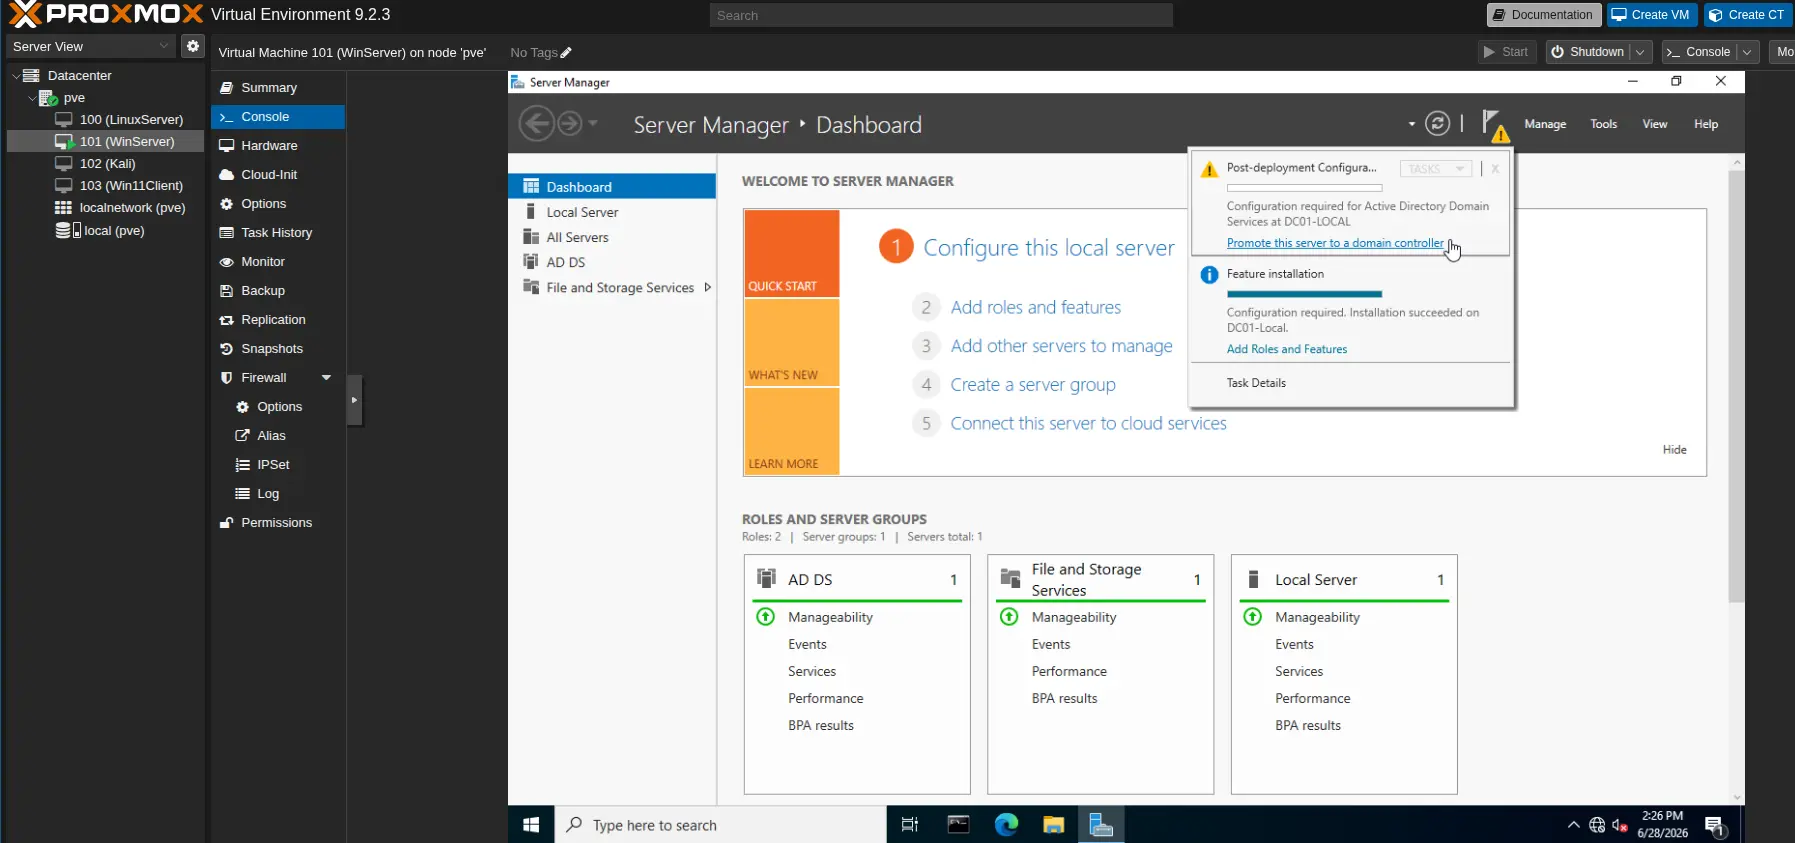
After AD DS installation, a notification flag will appear in Server Manager.
- Click the notification flag icon in Server Manager.
- Select Promote this server to a domain controller.
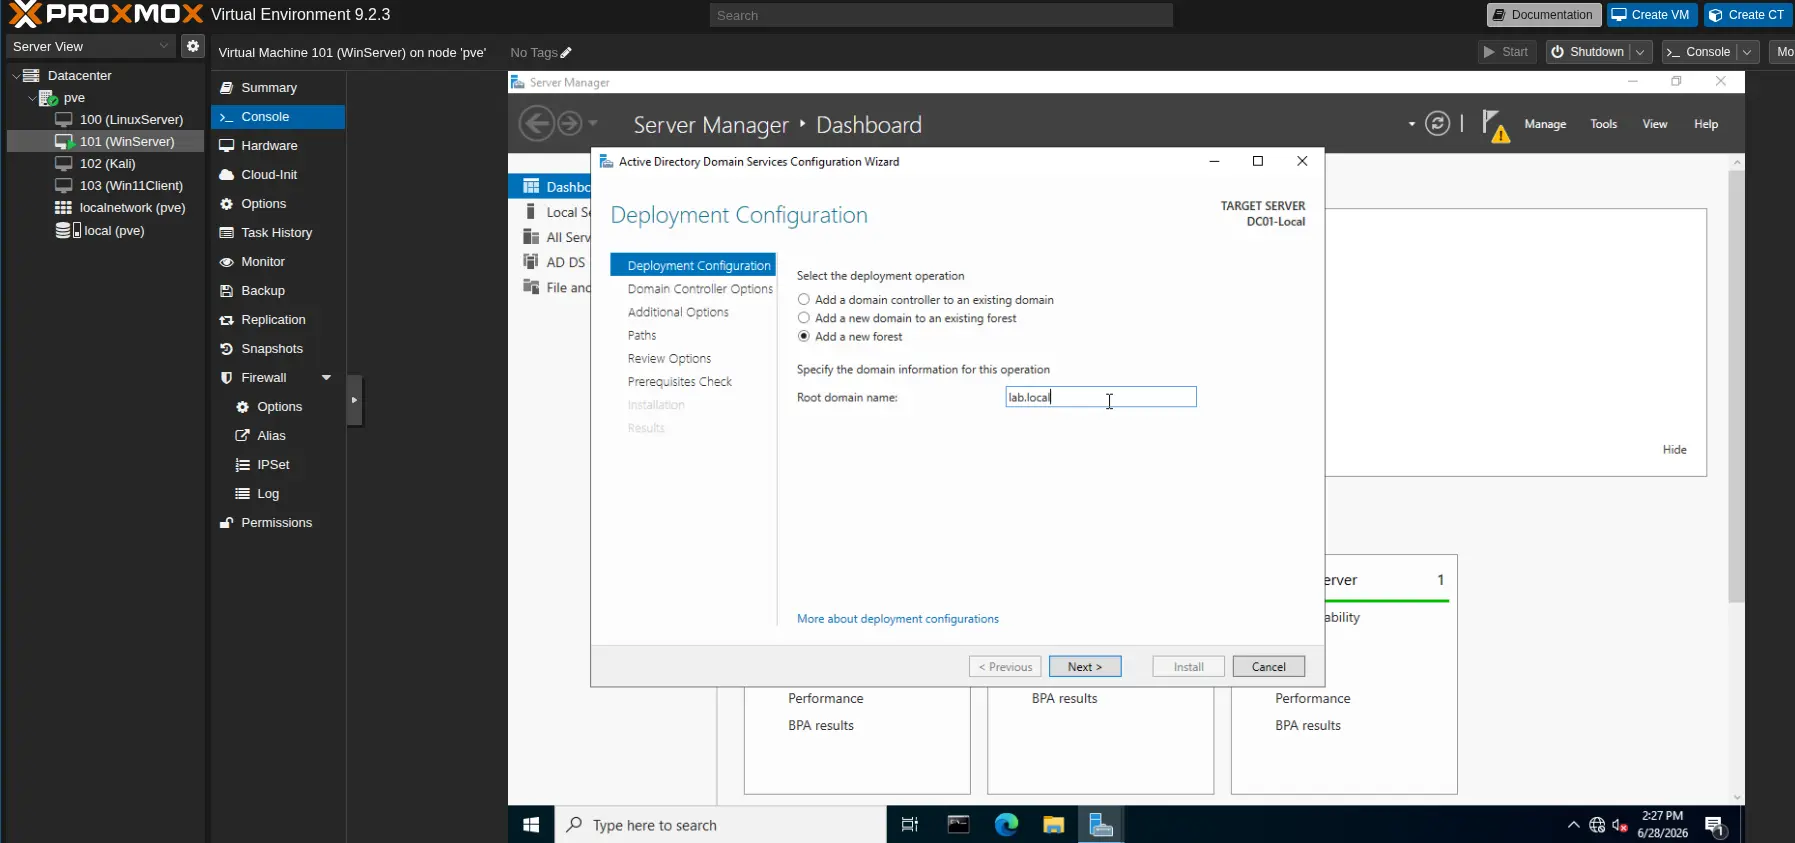
- Select Add a new forest.
- Enter your Root domain name (e.g.,
lab.local). - Set a strong Directory Services Restore Mode (DSRM) password and store it securely.
- Follow the wizard with default settings and allow the server to restart.
Phase 2: Building the OU Structure
Organizational Units (OUs) are your "filing cabinets" for organizing users, computers, and servers. They allow you to apply specific Group Policy Objects (GPOs) to different departments or device types.
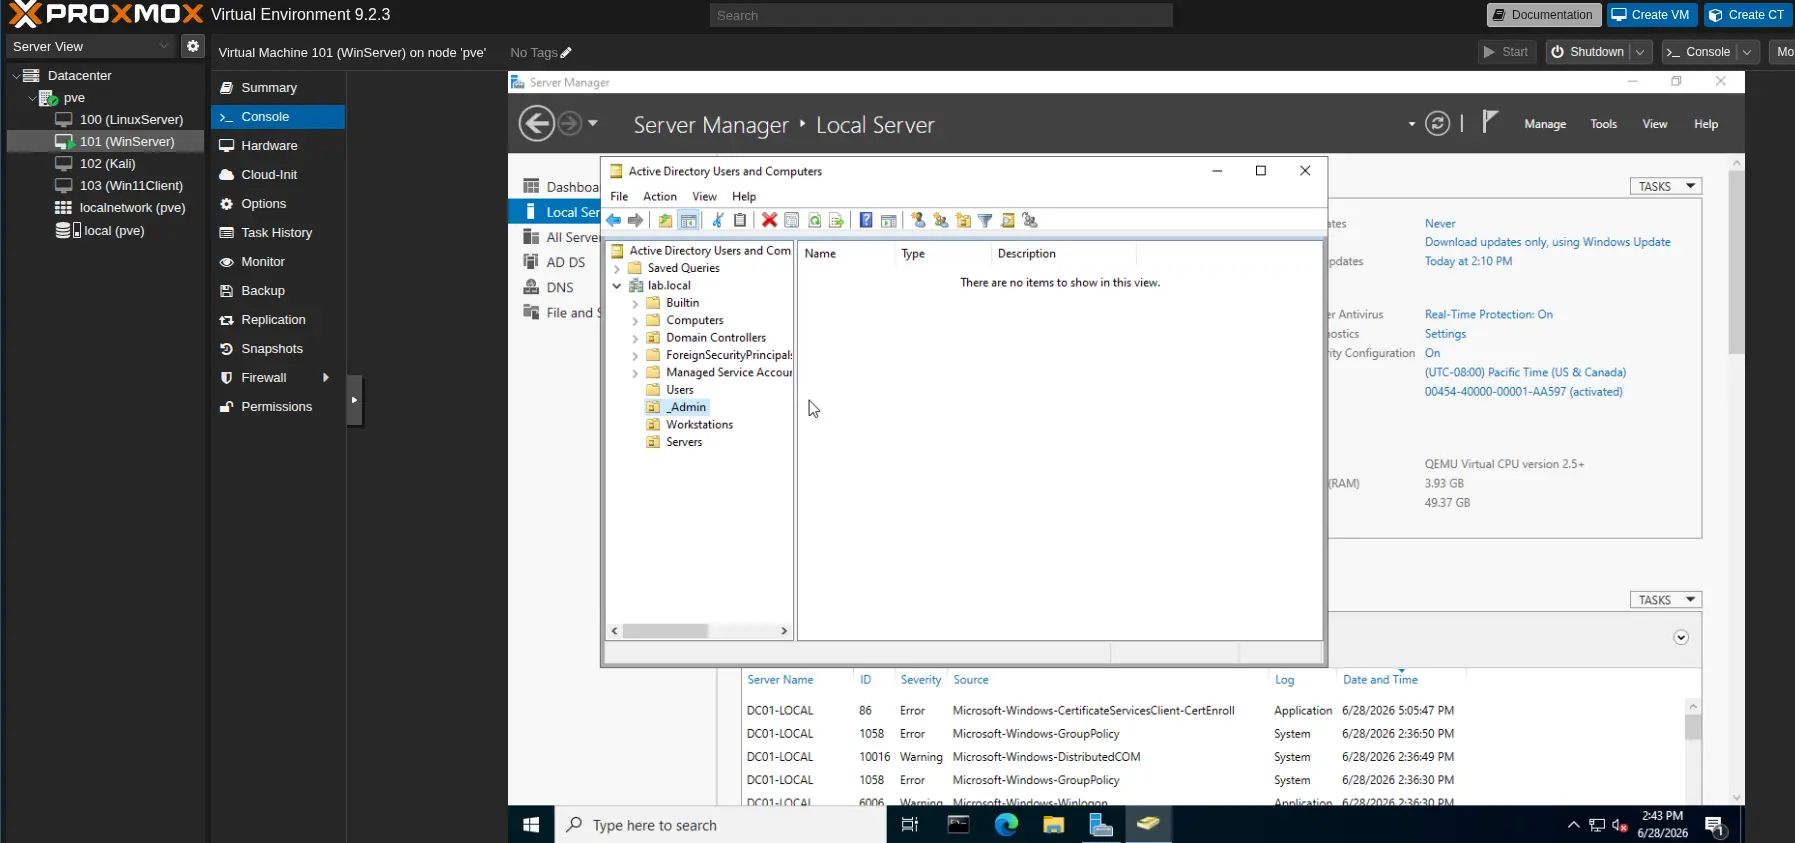
Create the OU Hierarchy
- Open Active Directory Users and Computers (ADUC): Press
Win + R, typedsa.msc, and press Enter. - Right-click your domain (e.g.,
lab.local) → New → Organizational Unit. - Create the following structure:
_Admin(Use an underscore to force it to the top)Users(With sub-OUs for departments likeIT,HR,NYC)Workstations(With sub-OUs for locations likeNYC)Servers
Create a Test User
- Right-click your
Users → ITOU → New → User. - Follow the wizard to create a test account (e.g.,
jdoe) and set an initial password.
Phase 3: Joining a Client Machine
Now that your Domain Controller is operational, you can join Windows 10 or Windows 11 client machines to your domain.
Configure the Client
- Network Configuration: Ensure the client VM's network adapter is on the same virtual bridge (e.g.,
vmbr1) as your DC. - DNS Configuration: Set the client's Preferred DNS to the IP address of your DC (e.g.,
192.168.1.10). This is the most common point of failure—the client must be able to resolve your domain name.
Join the Domain
- On the client machine, right-click This PC → Properties → Advanced system settings.
- Go to the Computer Name tab → Change.
- Select Domain and type your domain name (e.g.,
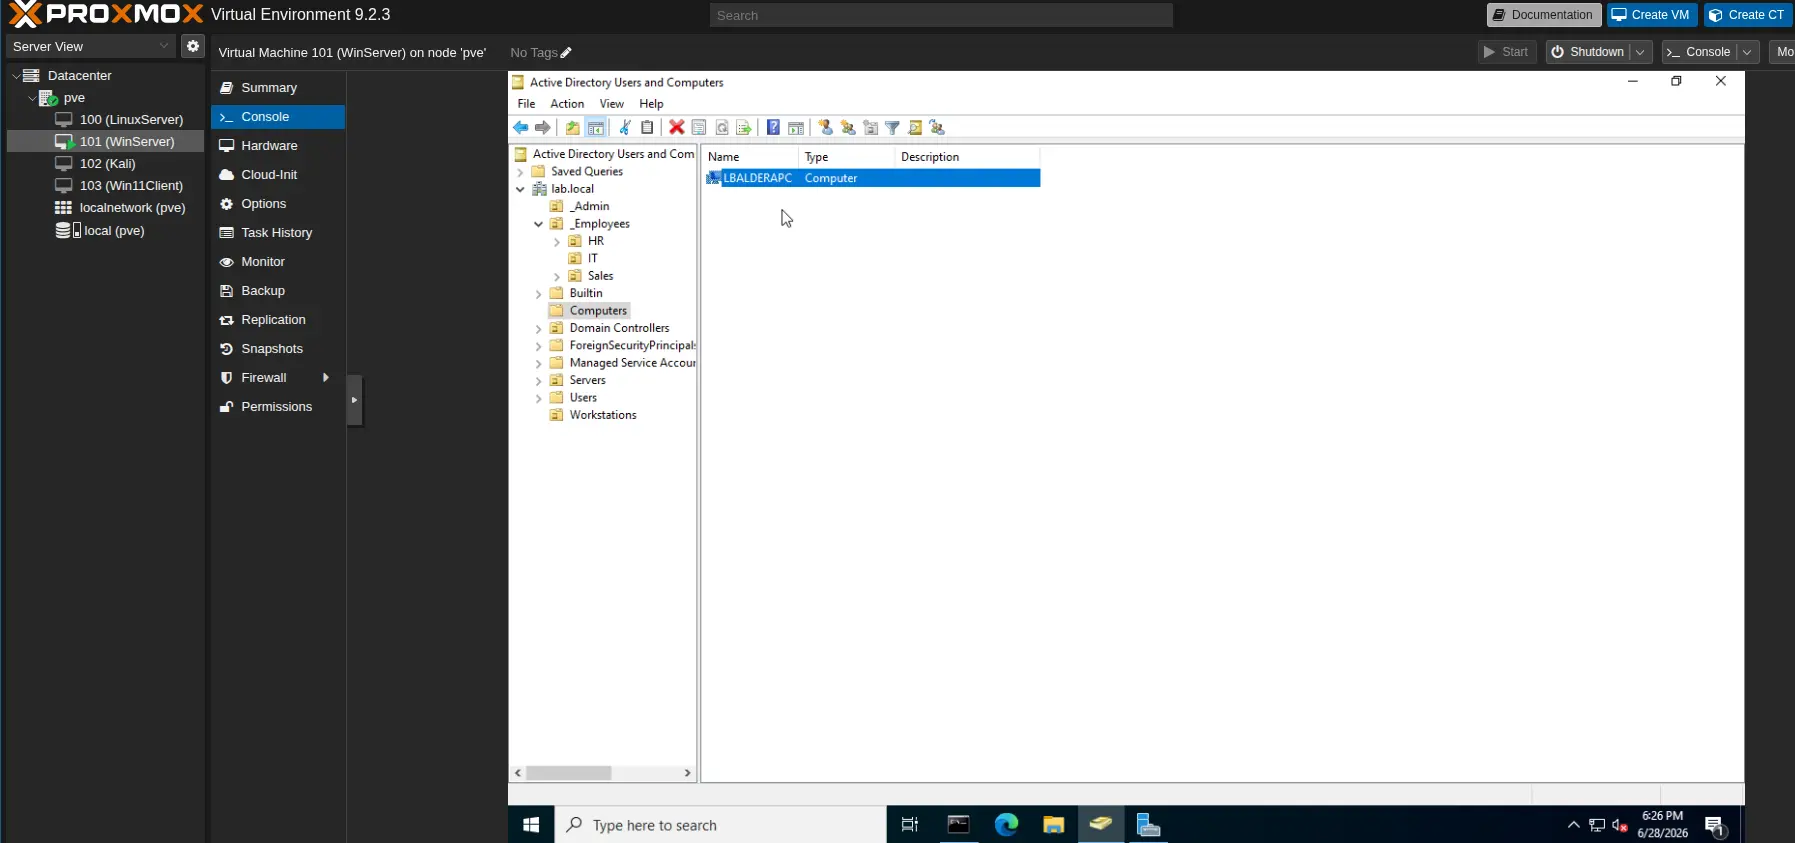
lab.local) → OK. - When prompted, enter your Domain Administrator credentials (the
Administratoraccount on your DC). - Restart the client machine.
- You can now log in using domain credentials:
LAB\jdoe.
Troubleshooting: DNS Delegation Issue
When promoting your server to a Domain Controller, you may encounter a "DNS delegation" warning. This is very common in isolated lab environments.
Why This Happens
The error occurs because the DNS server cannot create a "delegation" in the parent DNS zone. Since your lab domain (lab.local) is isolated inside Proxmox and not registered with a public registrar, there is no "parent zone" to delegate to.
How to Proceed
You can safely ignore this warning. Simply click Next in the promotion wizard. Your Active Directory will function perfectly for your internal lab.
Once promotion completes, verify your DNS health:
- Open Server Manager → Tools → DNS.
- Expand your server name → Forward Lookup Zones.
- Ensure your domain (e.g.,
lab.local) is listed with_msdcs,_sites,_tcp, and_udpfolders. These are automatically created and are critical for AD functionality.
Next Steps
Once your domain is operational, you can:
- Configure Group Policy Objects (GPOs) for security baselines.
- Create user accounts and security groups for role-based access control.
- Join additional workstations and servers to the domain.
- Configure domain-wide security policies and audit logging.