
pfSense + Proxmox: Building an Isolated Virtual Lab Network
Deploying a dedicated pfSense virtual gateway on Proxmox to create an air-gapped sandbox network for Active Directory, domain controllers, and testing endpoints without touching your home LAN.
This guide outlines the process of isolating a Proxmox lab environment by deploying a dedicated pfSense virtual machine (VM). This architecture keeps your home ISP-managed devices on a standard bridge while creating an "air-gapped" virtual bubble for your lab VMs.
Phase 1: Create the Isolated Network (Bridge)
This bridge acts as a virtual "switch" that is not connected to any physical hardware ports, ensuring your lab VMs stay strictly off your main home network.
- Log in to your Proxmox Web UI.
- Navigate to Datacenter → [Your Node] → System → Network.
- Click Create → Linux Bridge.
- Name:
vmbr1 - Bridge ports: Leave BLANK (this is crucial for complete network isolation).
- Click Create and then Apply Configuration.
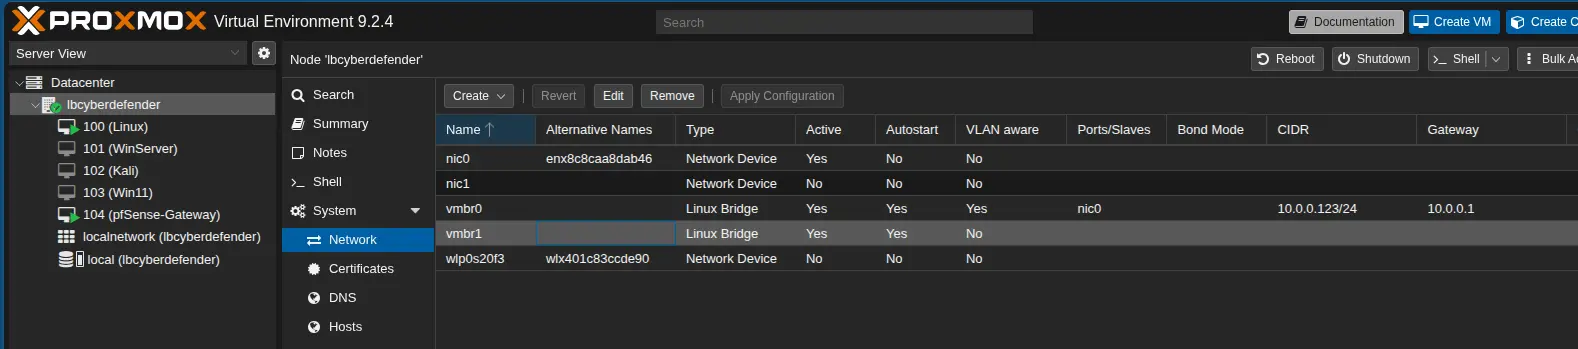
vmbr0(Management Bridge): Connected to the physical NIC, handles Proxmox PVE GUI, SSH, and host management traffic.vmbr1(Internal Bridge): Isolated virtual switch with no physical slave port, handling only guest lab traffic.
- Name:
vmbr1 - Bridge ports: [Leave blank]
- IPv4/CIDR: [Leave blank]
- IPv6/CIDR: [Leave blank]
- VLAN aware: [UNCHECKED]
Phase 2: Deploy the pfSense VM
-
Download ISO: Fetch the latest pfSense CE ISO and upload it to your Proxmox
localstorage. -
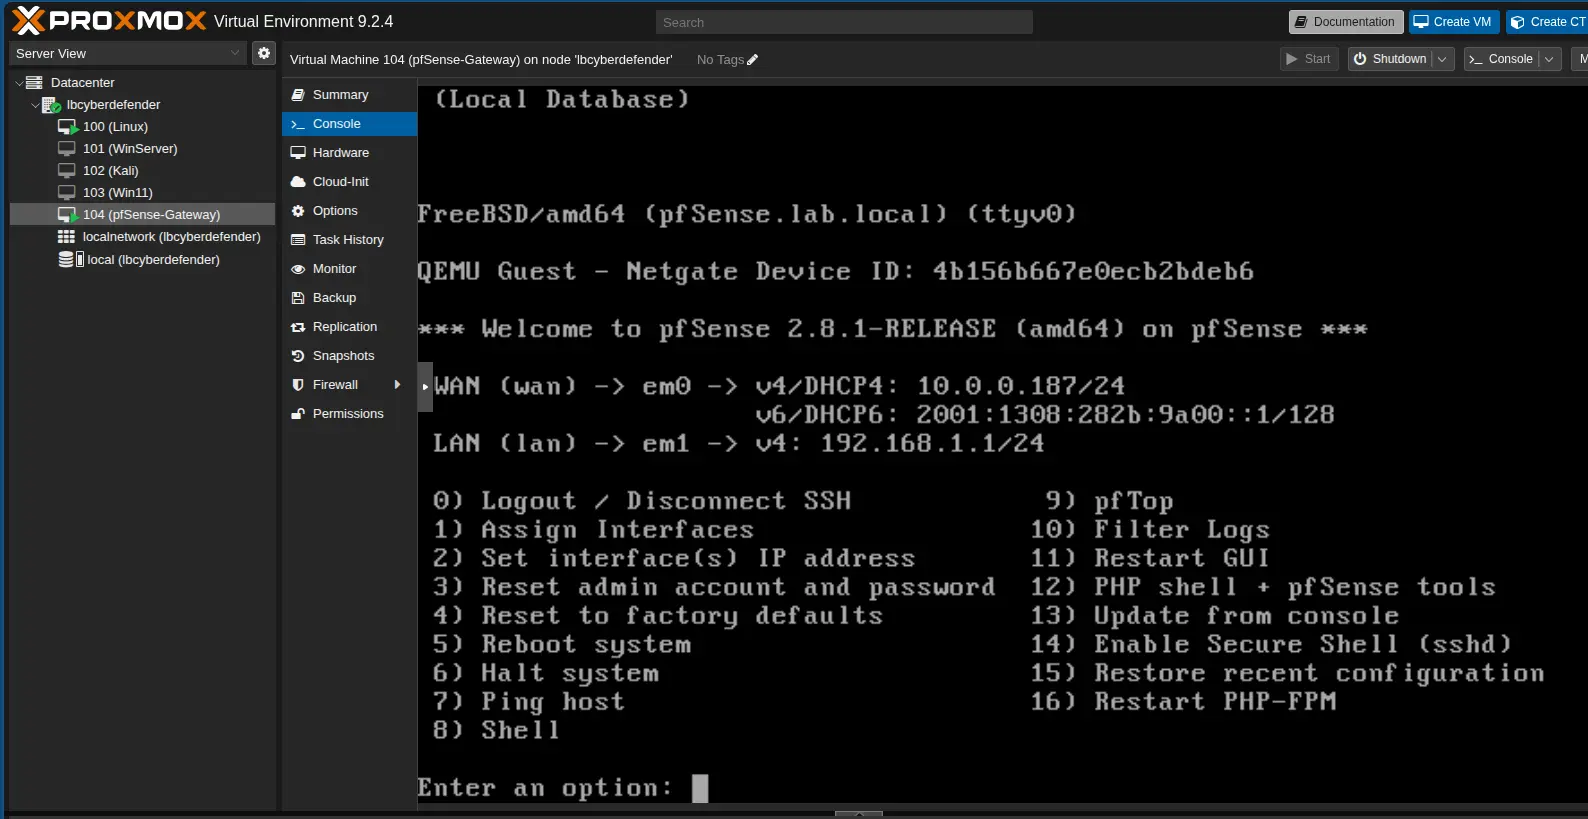
Create VM: Click Create VM in the top-right toolbar:
- General: Name it
pfSense-Gateway. - OS: Select the pfSense ISO. Guest OS Type: Other.
- System: Default settings (Keep QEMU Agent enabled).
- Disks: 32GB+ recommended (Enable IO Thread for improved I/O throughput).
- CPU: 2 vCPUs are sufficient for lab workloads.
- Memory: 2GB to 4GB RAM.
-
Network:
- NIC 1 (WAN): Select
vmbr0(Your uplink bridge to the ISP network). - Add Network Device: Click Add → Network Device.
- NIC 2 (LAN): Select
vmbr1(Your new isolated bridge). - Model: Set both NICs to
VirtIO (paravirtualized). Uncheck "Firewall" on these virtual NICs to prevent Proxmox pve-firewall rule interference.
- NIC 1 (WAN): Select
- General: Name it
Phase 3: Install & Assign Interfaces
- Start the
pfSense-GatewayVM and launch the Console. - Follow the installation prompts (Accept, Install, ZFS Auto-Partitioning).
-
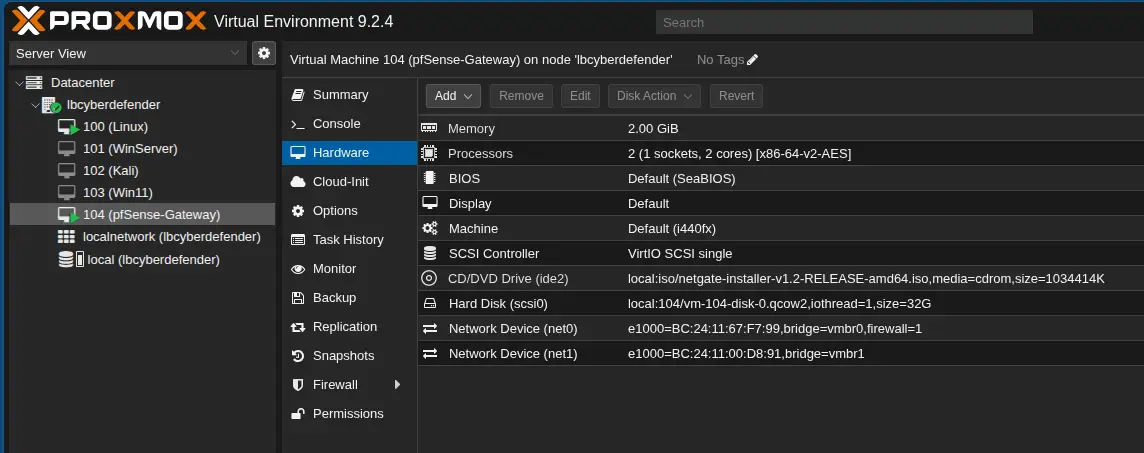
Interface Assignment: Once installed and rebooted, console prompts will request interface assignments:
- VLANs: Type
nand hit Enter. - WAN: Enter
vtnet0(bound tovmbr0). - LAN: Enter
vtnet1(bound tovmbr1). - Type
yto confirm assignments.
- VLANs: Type
- Once assigned, note the LAN IP (default gateway is typically
192.168.1.1).
Phase 4: Configure the Lab & Route Endpoints
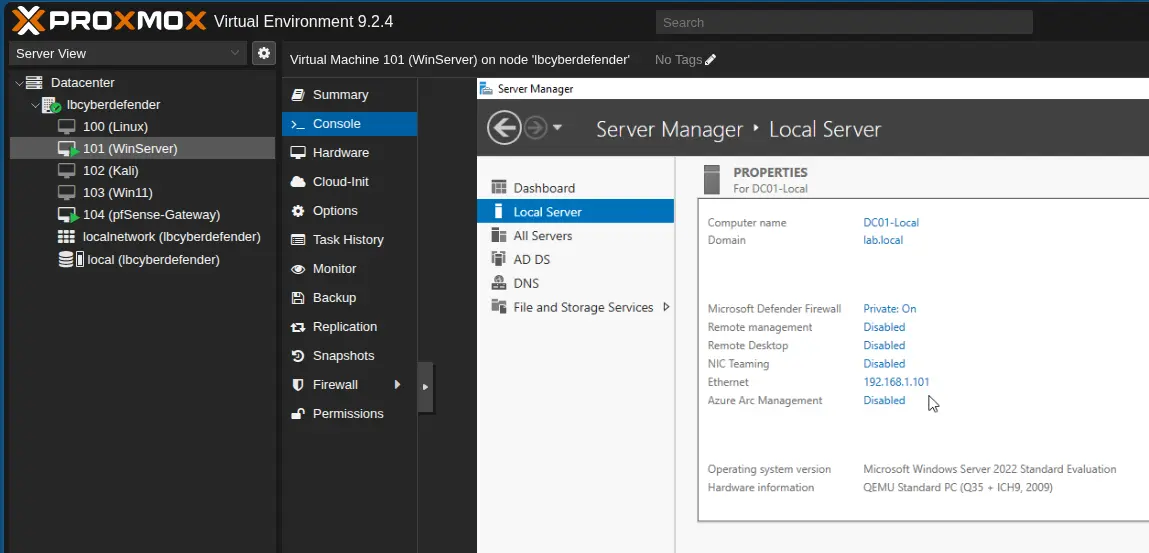
Now we attach target lab machines (such as our Active Directory Domain Controller and Windows 11 client) to the isolated network:
- Shut down your target lab VM (e.g., Domain Controller or Windows 11 client).
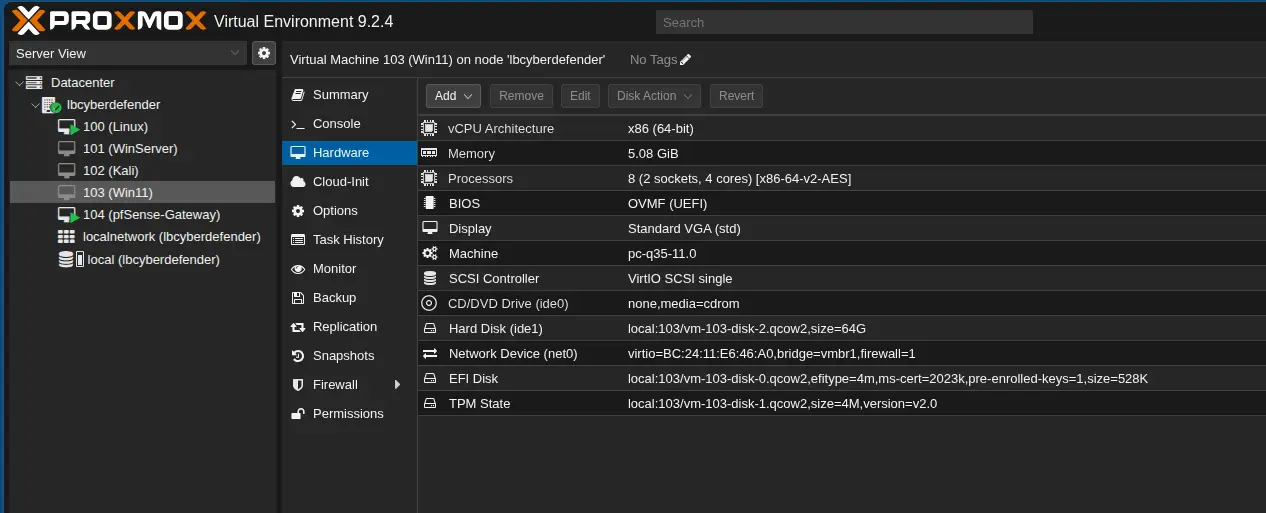
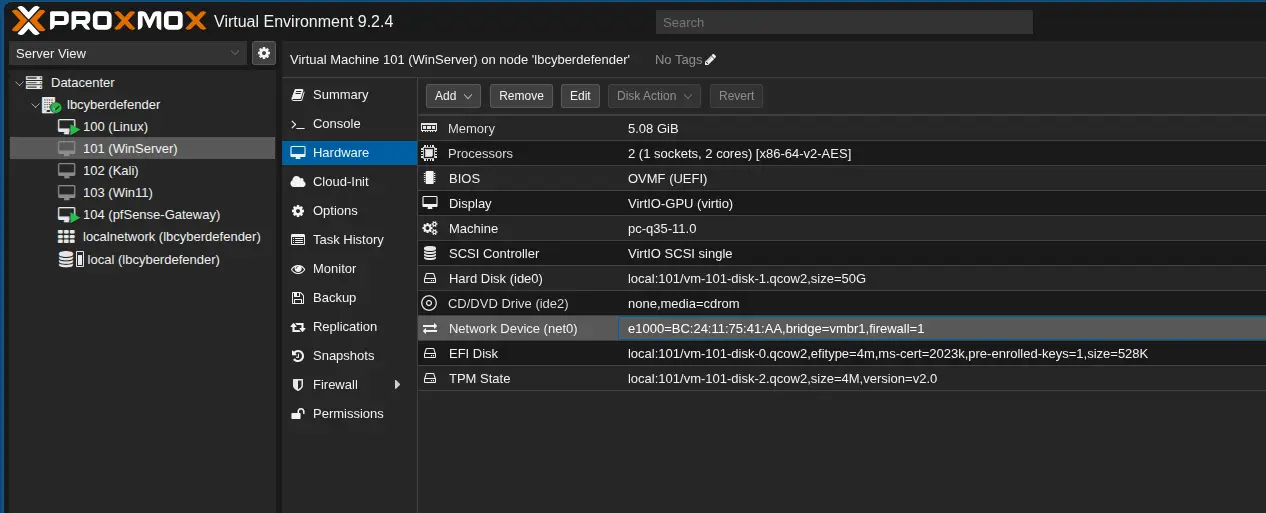
- In Proxmox, select the VM → Hardware → Network Device → Edit.
- Change the bridge from
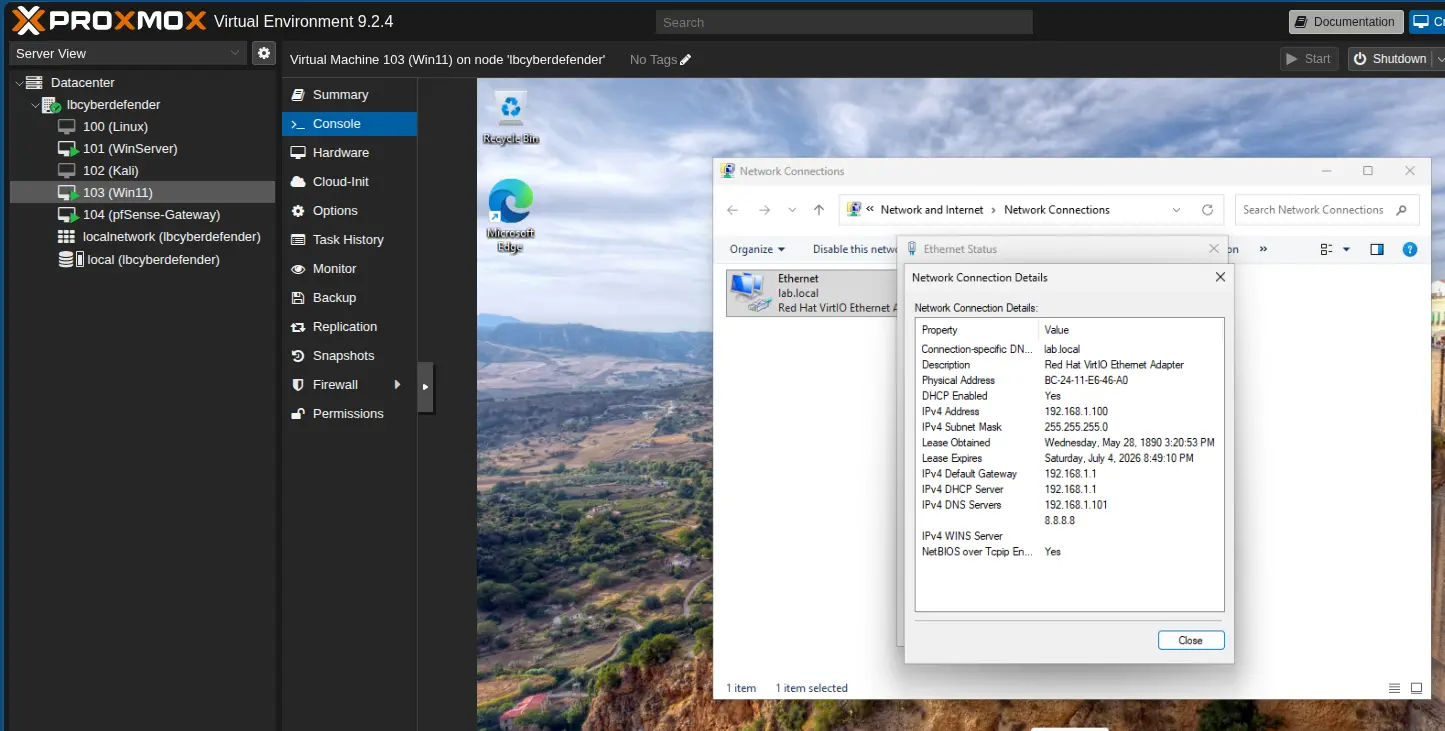
vmbr0tovmbr1. - Power the VM back on. It will immediately request an IP lease from the pfSense DHCP server rather than your home router.
-
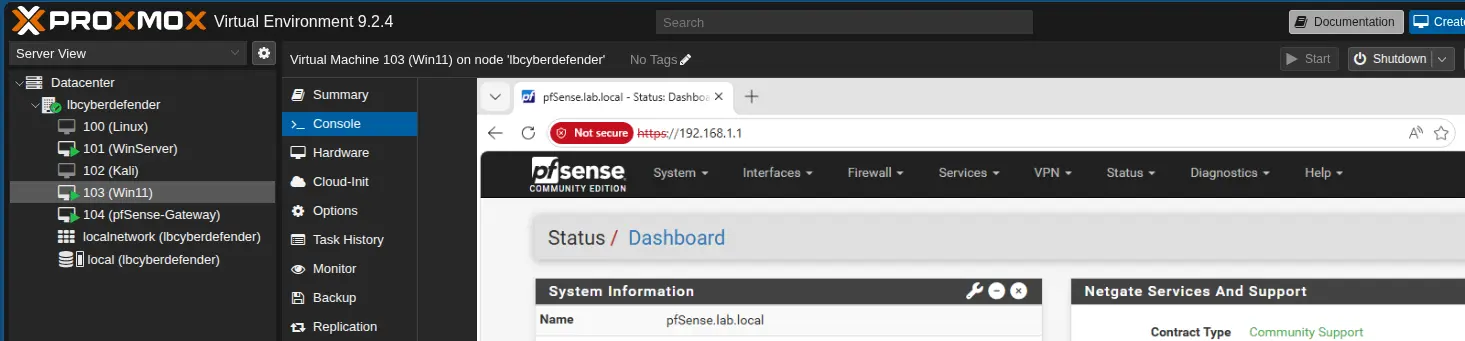
Access: From your Windows 11 lab VM, navigate to
https://192.168.1.1in your browser to access the pfSense Web GUI.
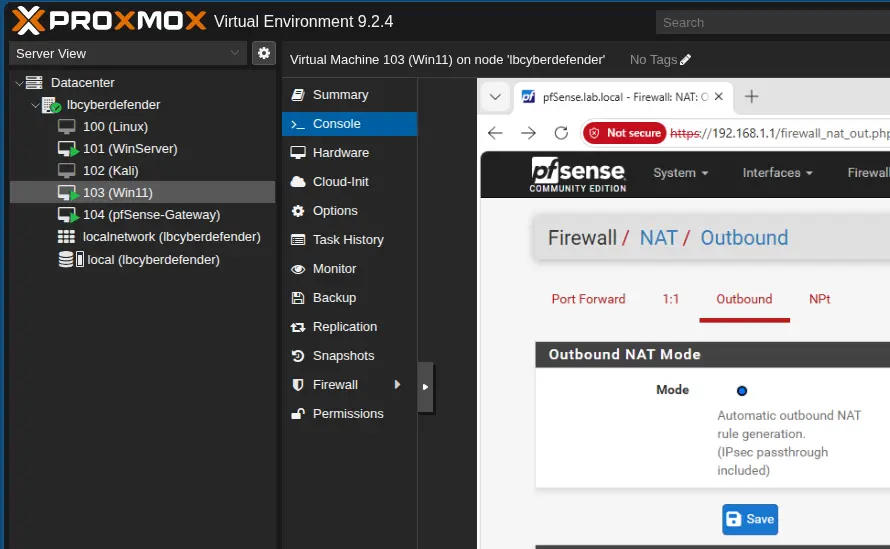
NAT Outbound Verification
Verify that Firewall → NAT → Outbound is set to "Automatic outbound NAT rule generation". This ensures all guest VMs on vmbr1 receive masqueraded internet access while remaining completely invisible and unreachable from the external home network.
Phase 5: Security Hardening – Disabling WAN Management
To ensure management interfaces are never exposed to the ISP side:
- Navigate to System → Advanced → Admin Access.
- Locate the WebGUI redirect section and check "Disable webConfigurator redirect rule".
- Navigate to Firewall → Rules → WAN.
- Review WAN rules: If any rule permits TCP/443 (HTTPS) or TCP/80 (HTTP) from "Any" source to "WAN Address", disable or delete it immediately.
- By default, pfSense blocks all unsolicited WAN traffic, but explicit verification guarantees your firewall interface cannot be reached from outside the lab bubble.
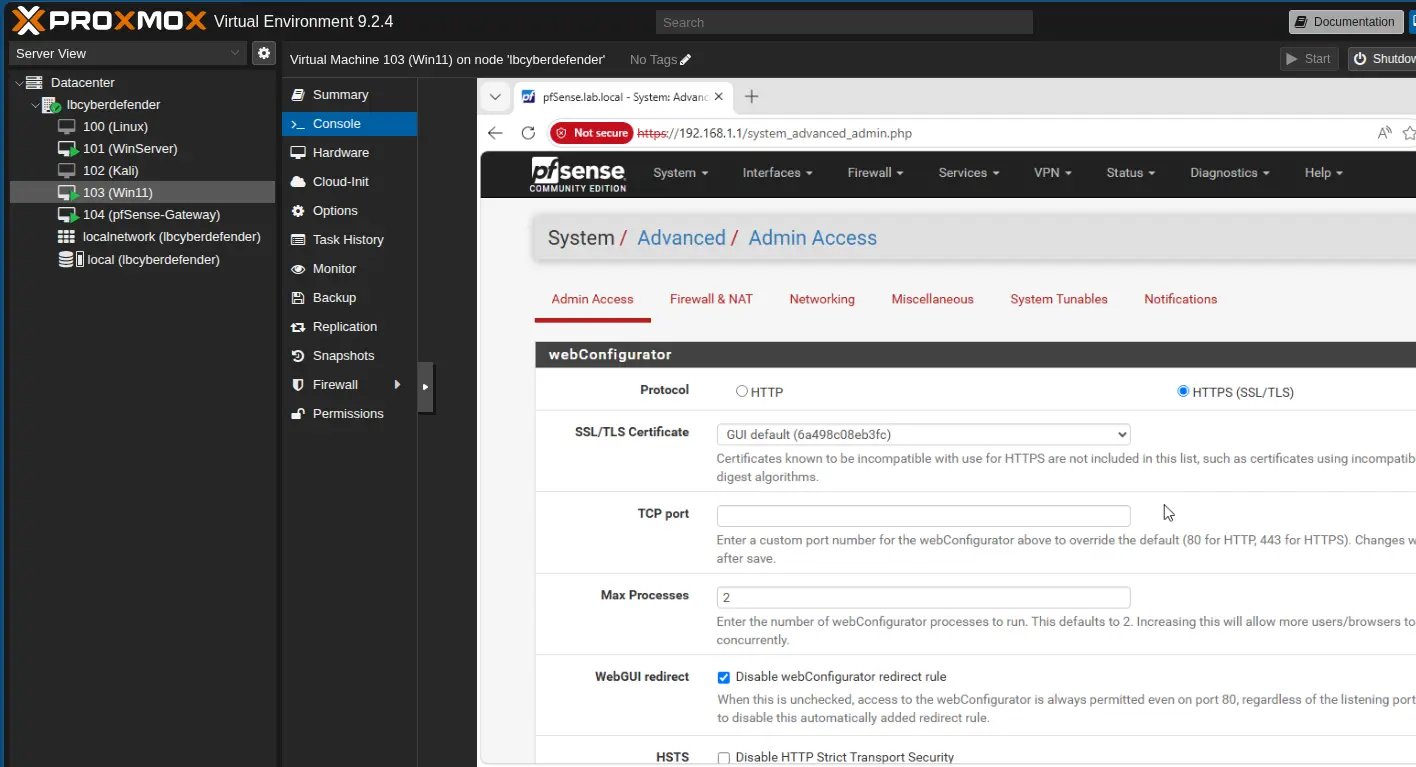
pfSense includes an Anti-Lockout Rule enabled by default on the LAN interface. This rule prevents administrators from accidentally locking themselves out of the WebGUI from inside vmbr1.
Install pfSense on Proxmox Guide — Demonstrates initial bridge provisioning and interface bindings.